Tutorial
This walkthrough goes from a fresh install to a discount you can see in a test checkout. It takes about fifteen minutes. Field and button names below are the ones in the app, quoted exactly.
Before you start, check that your store uses Shopify’s extensible checkout rather than the legacy
checkout.liquid. Shopify Functions, which is how this app applies its discount, only run on the
extensible checkout.
1. Install the app
Install Bundles Monk from its App Store listing and approve the access it asks for.
2. Open the app once
Open Bundles Monk from Apps in your Shopify admin. The first admin load does three pieces of setup by itself: it creates the metafield definitions the app uses, it compiles your sets for checkout, and it creates one automatic app discount, named for the app, that points at the bundle discount function. You do not have to create a discount by hand, and you should not delete that one.
If a warning headed Some bundle app setup steps didn’t finish appears at the top, read the list under it. The app retries every step on your next visit, so reloading is usually enough.
The home page shows a Setup guide with three steps and a Your plan card with your current usage against your plan’s allowance.
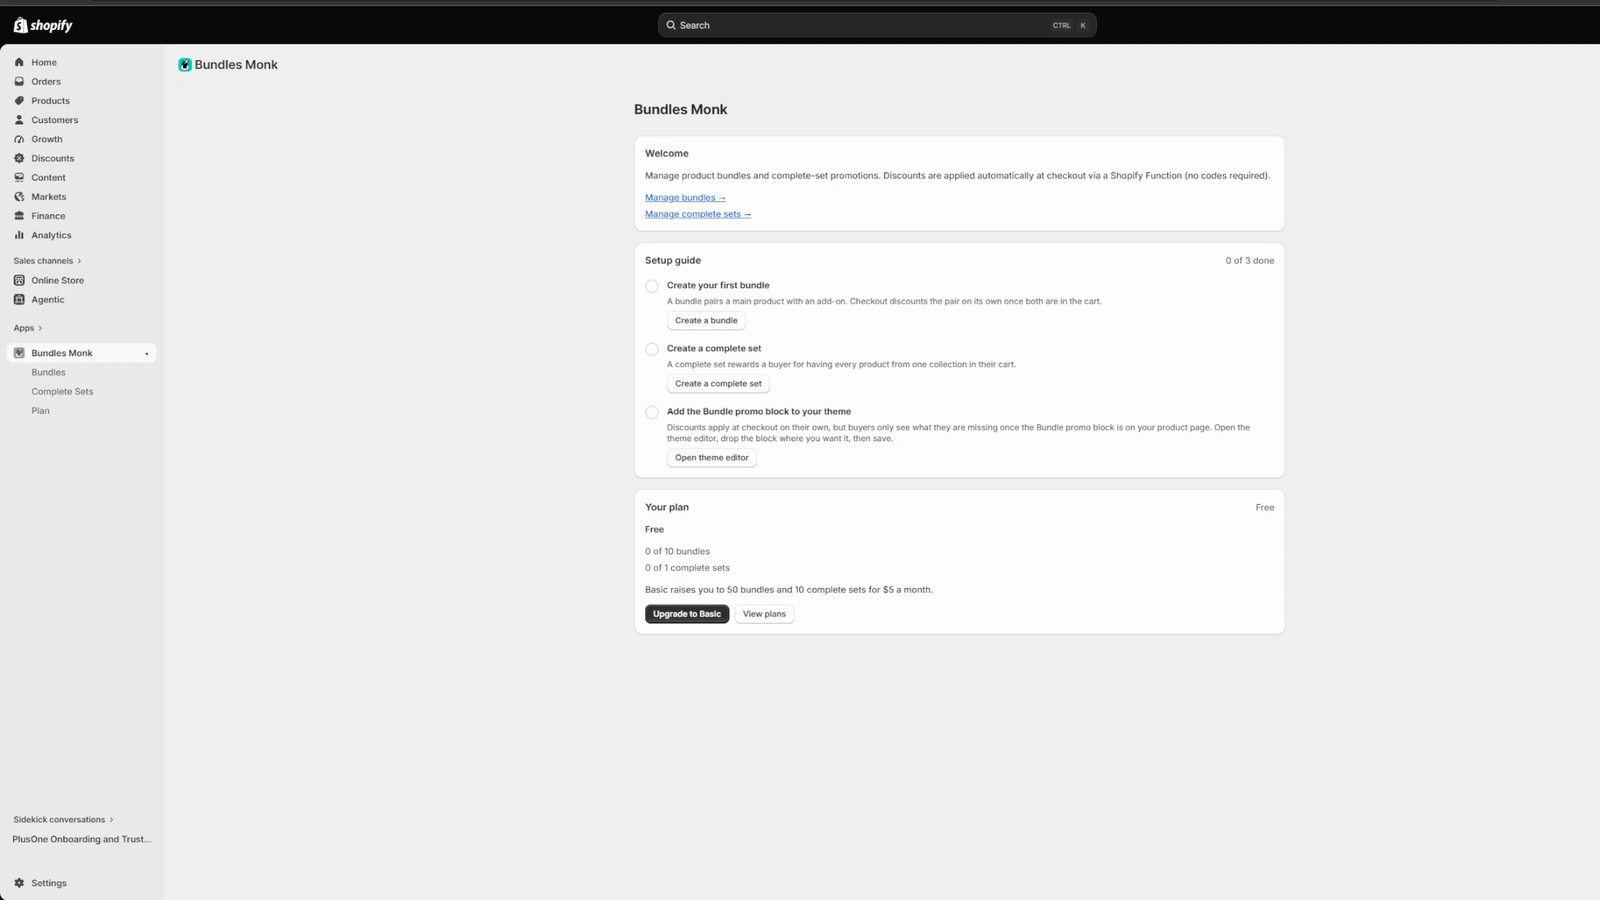
3. Create your first bundle
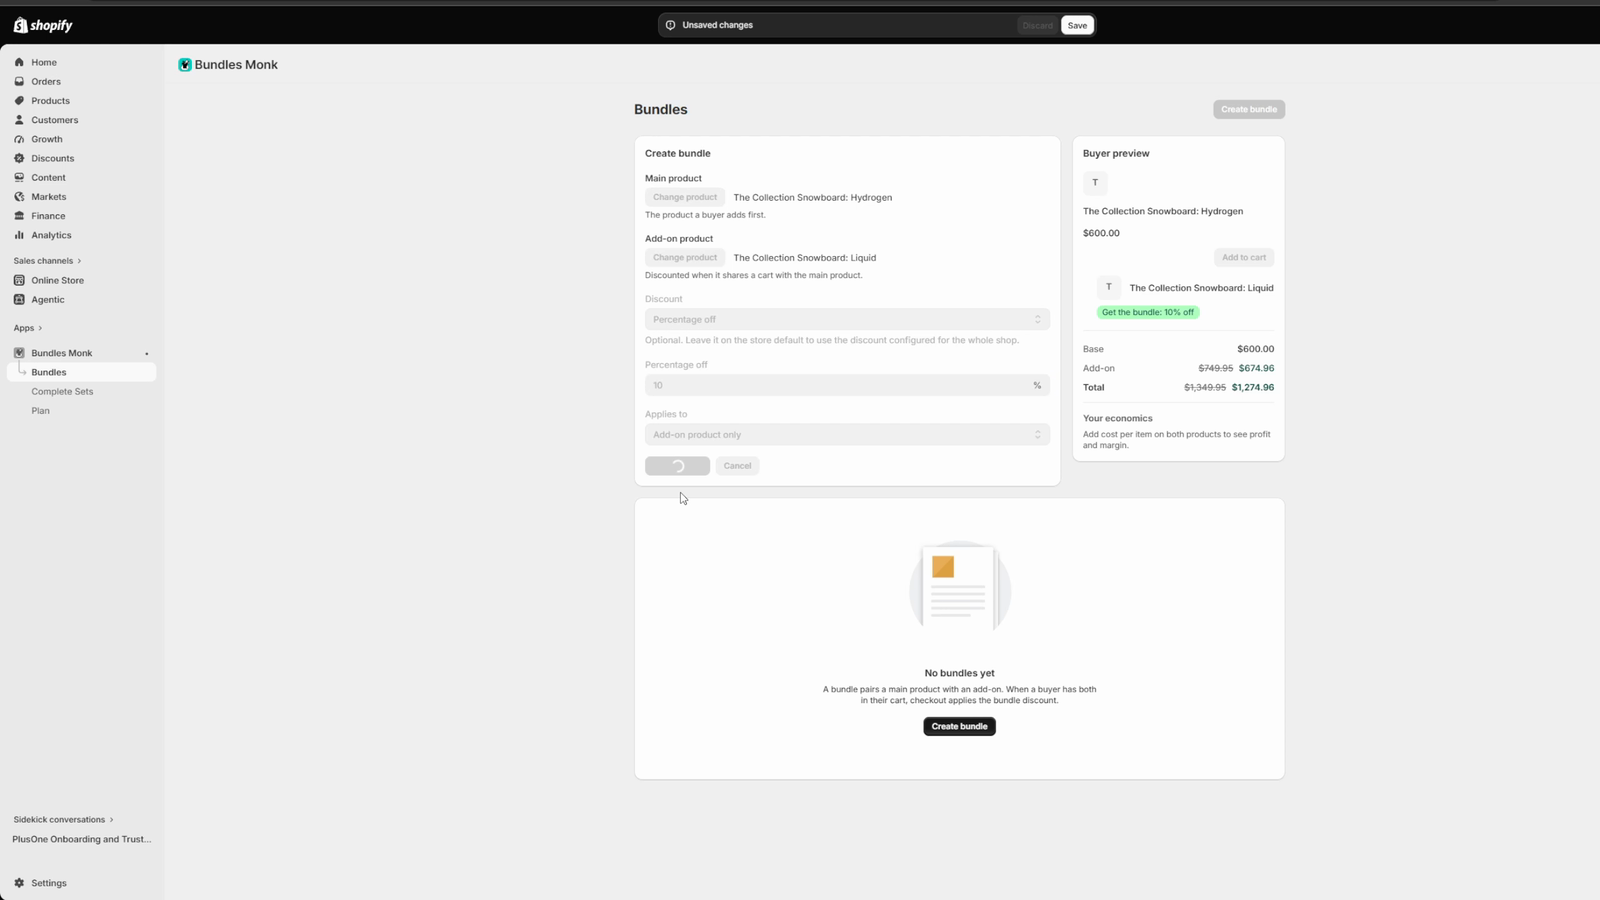
- Open Bundles in the app’s navigation, then press Create bundle.
- Under Main product, press Select product and choose the product a buyer adds first.
- Under Add-on product, choose the product that should be discounted when it shares a cart with the main product.
- Under Discount, pick Percentage off, Fixed amount off, or leave it on Use store default.
- If you picked a type, enter the number in Percentage off or Amount off.
- Under Applies to, choose Add-on product only or Both products.
- Press Save bundle.
The Buyer preview panel beside the form shows what the pair costs before and after the discount while you type, and, if your products carry a cost per item, the profit and margin.
4. Create your first complete set
- Open Complete Sets, then press Create complete set.
- In Name, type the set’s name. The app describes this as a name only you recognise, but it is also what buyers read: the checkout discount line and the storefront card both say “Complete the name”. Keep it presentable.
- Under Build the set from, choose A collection (members follow the collection, so adding a product to it grows the set) or Products I pick (a fixed list).
- Press Select collection, or Add products if you are picking them by hand.
- In the items list, a product with more than one variant offers Count as. Leave it on One item (any variant) if any variant counts, or choose Each variant separately and tick the variants that are each their own collectible.
- Under Reward, choose Percentage off, Fixed amount off, or Use store default, and enter the value.
- Decide on Count out-of-stock items as collected, so buyers are not blocked by products you cannot stock. It is on by default.
- Decide on Add all to cart re-adds items the buyer already has. Off (the default) means the storefront button adds only what is missing.
- Press Create complete set.
Saving a set immediately recompiles the configuration that checkout reads, so the set is live as soon as the page comes back. If anything could not be compiled, the app says so on the list page rather than failing silently.
5. Add the storefront block to your theme
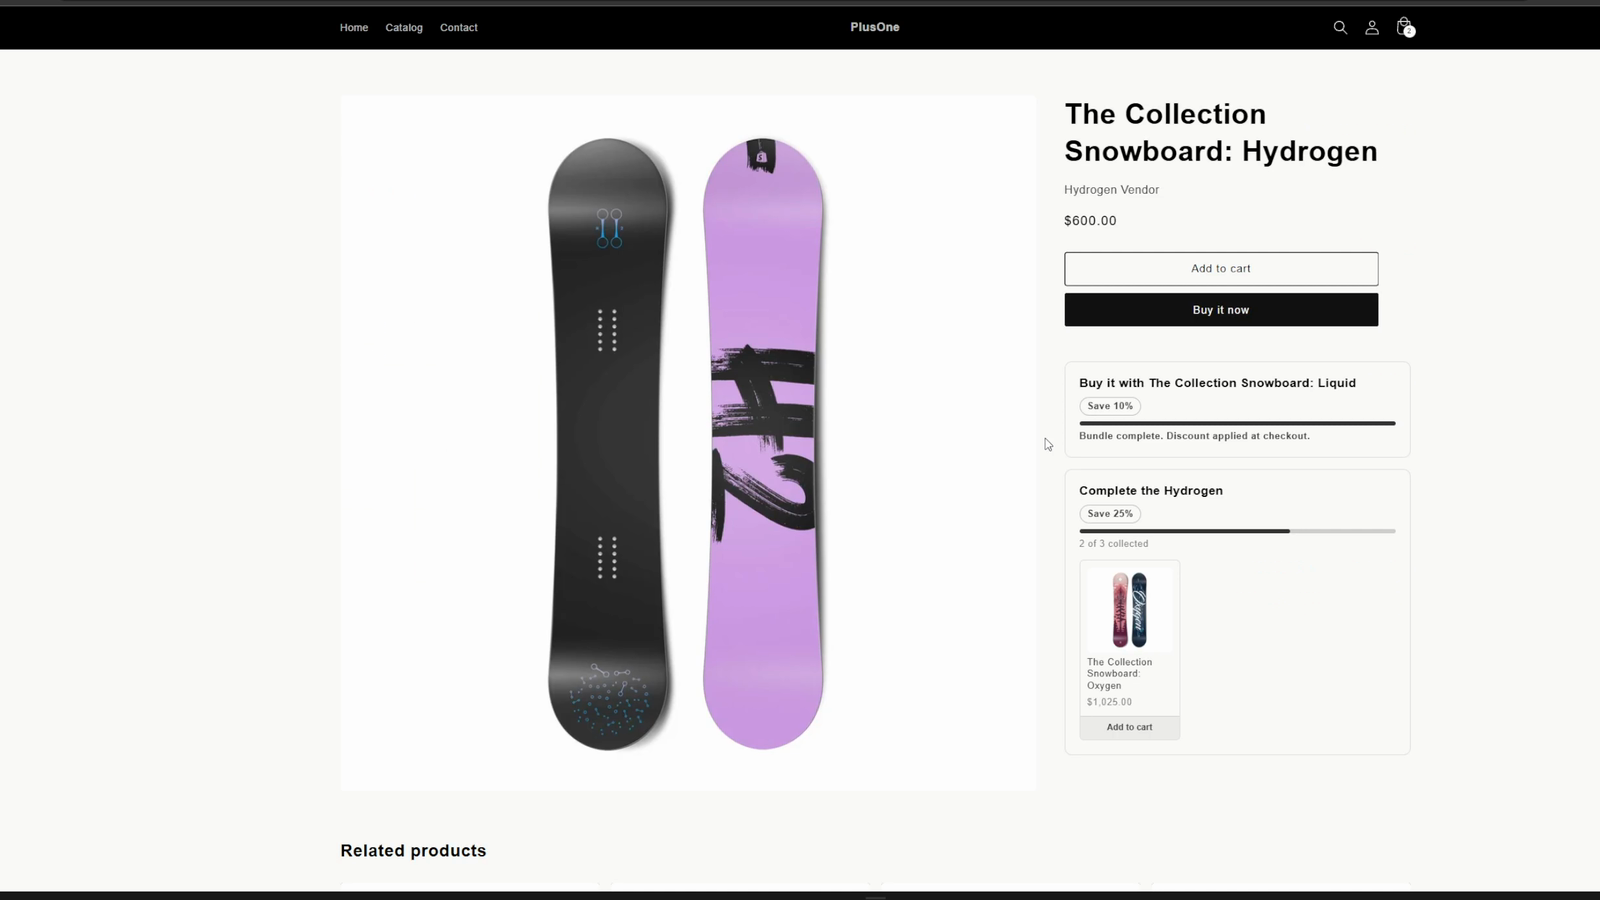
The discount applies at checkout with or without this step, but buyers cannot see the offer until a block is on the product page.
- On the app’s home page, in the setup guide step Add the Bundle promo block to your theme, press Open theme editor. The editor opens on your live product template with the block staged in the main product section.
- Drag the block to where you want it. Below the price and above the variant picker is a common choice.
- Press Save in the theme editor.
Three blocks ship with the app: Bundle promo (both cards) shows both mechanics in one block, while Bundle it and Complete the set let you place and style each one on its own. All three can only be added to product templates. Each has settings for the colour scheme, heading size, banner image, progress display, missing products and button placement.
If you add a block to a product with nothing configured, the theme editor shows a placeholder card explaining that. Only you see it, and only in the editor.
6. Test it in a checkout
- Open the product page of your bundle’s main product on the storefront. The card should show the offer and what is missing.
- Add both the main product and the add-on to the cart. The card switches to Bundle complete. Discount applied at checkout.
- Open the cart. The add-on’s line shows its discount.
- Go to checkout. The pair discount shows against its line, and a completed set shows as an order discount named after the set.
- Place a test order using Shopify’s test payment gateway, or a real order you then cancel, to confirm the discount lands on the order.
If nothing is discounted
- Check that both halves of the pair, or every item of the set, are in the cart at once. Partial carts get nothing.
- Check that the automatic discount the app created is still in Discounts and is active.
- Check that your reward has a value above zero, or that a store default is set.
- Check that the plan you are on still covers the number of sets you have saved. Sets past the allowance are switched off at checkout, and the app says which.
The FAQ covers the questions that come up most, and the documentation has the full rules.